Electronic Output Devices
This weekend I fabricated and assembled the structure of the two-nail hotdog cooker. Since this week's assignment was to use an output device I connected a stepper motor to open and close the hotdog chamber cover.
Return to my home page.
120 volt ac circuit for the hotdog cooker(below). The microswitch is only closed when the acrylic safety cover is closed. This way 120vac is only present at the nails when the cover is closed. I decided to go with the old school dependable microswitch rather than some type of electronic input device for maximum reliability/safety.(The switch came out of an industrial gas valve.)
Here are some photos of the cooker fabrication progress:
Hotdog engineering!
Cutting an acrylic tube thing in half on the table saw for the cooker safety cover.
Some more fab pictures:
The chassis is constructed of my favorite building material: 3/4" baltic birch plywood (I like the look of the multi-core edge).
This is a side view of the "stepper motor driven linear-to-rotational" actuator.
I had to add a half-circle shaped counter weight in order to get the stepper motor to smoothly move the cover thru its full range of motion.
Below is a high speed video of the hotdog chamber safety cover opening and closing:
Notice the micro switch that is engaged when the cover reaches the closed/safe position. This switch will only allow 120 volts at the solid state relay and nails when the cover is closed.
Random pictures from the weekend:

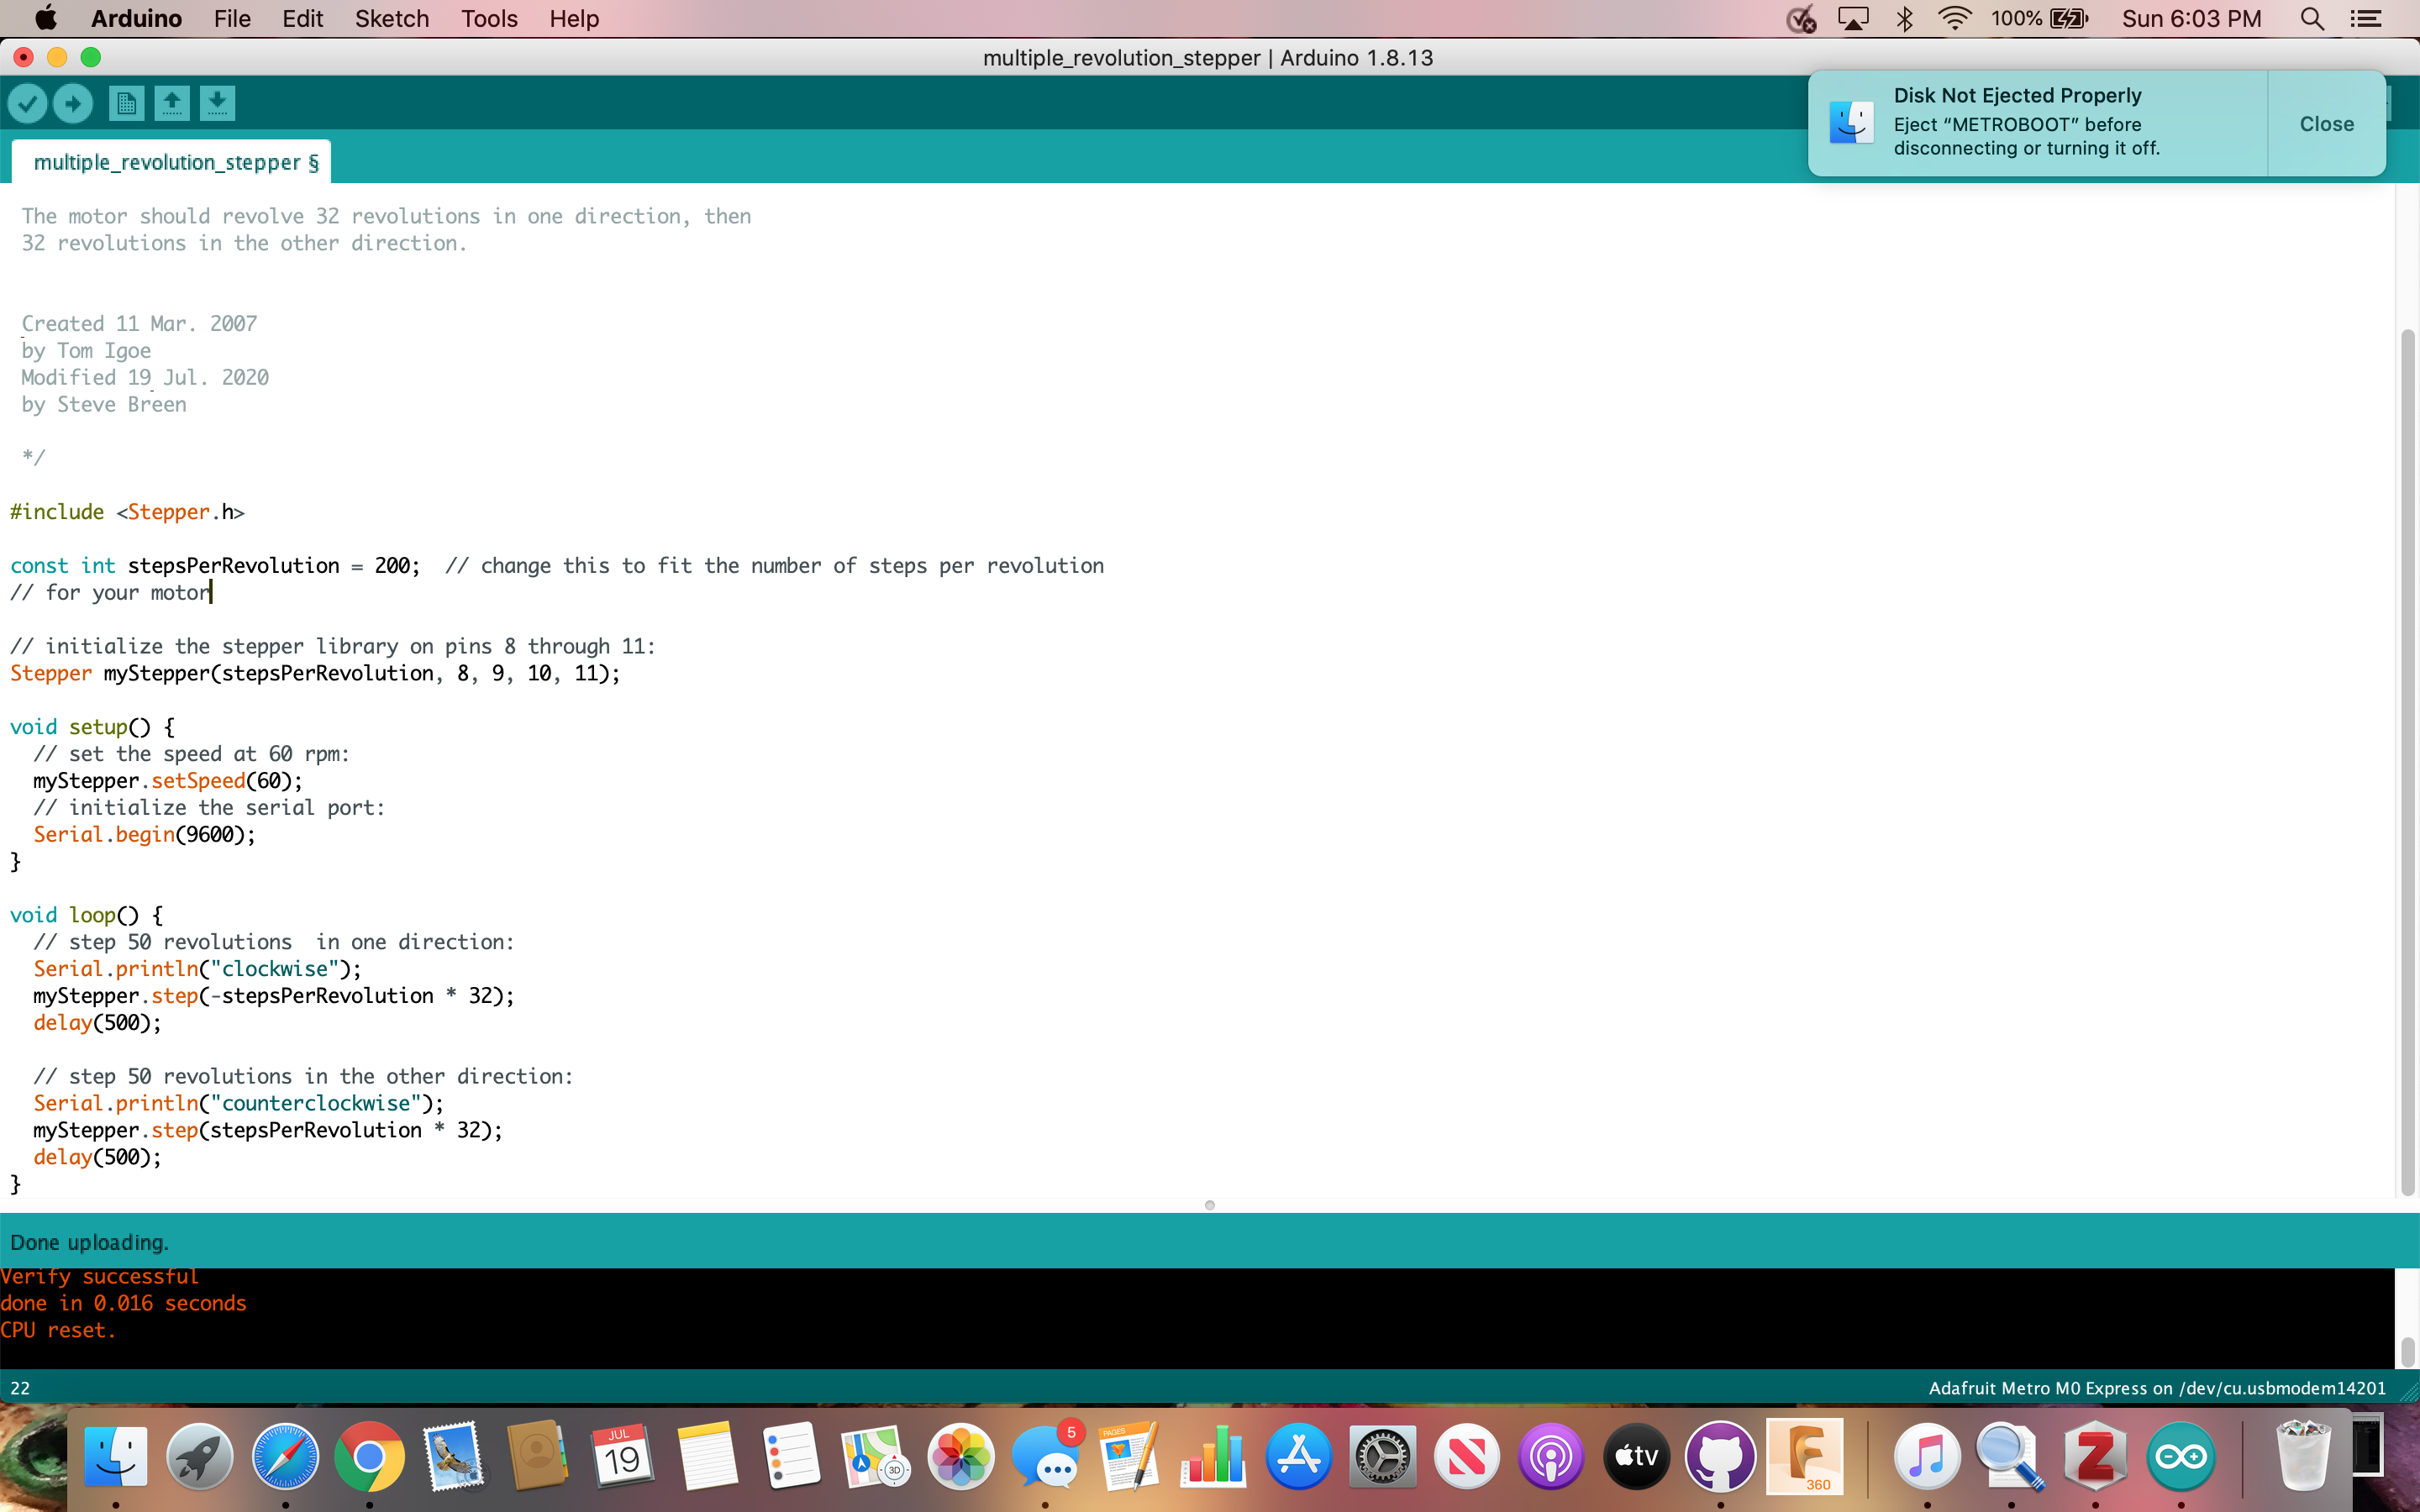
Here is a screen shot of the Arduino program I used to open and close the cover. It turns the threaded rod 32 revolutions; that is about 2 inches. I plan to cut this program in half (open program and close program), then replace the current servo motor code in my main hotdog cooker code with these stepper motor control codes. I may have to move some pin assignments around. The stepper uses 4 outputs, and the servo only is currently using one.
The solid state relay (120vac) is mounted behind acrylic for safety, yet the LED is still visible.