Programmable Electronics
"A world without hotdogs is chaos!"
For the programming aspect of my hotdog cooker project, the Arduino will have to control the following:
- The program will need to close and open the safety cover of the hotdog cooking chamber;
- The solid state relay that switches the 120vac to the cooking electrodes will have to be turned on and off to very the power delivered to the hotdog;
- A timer or counter will be needed to start and end the cooking process;
- Possibly a visible/audible signal during the time the hotdog electrodes are powered might be interesting and useful;
- Finally, a hotdog odometer to track the total number of hotdogs cooked would be interesting.
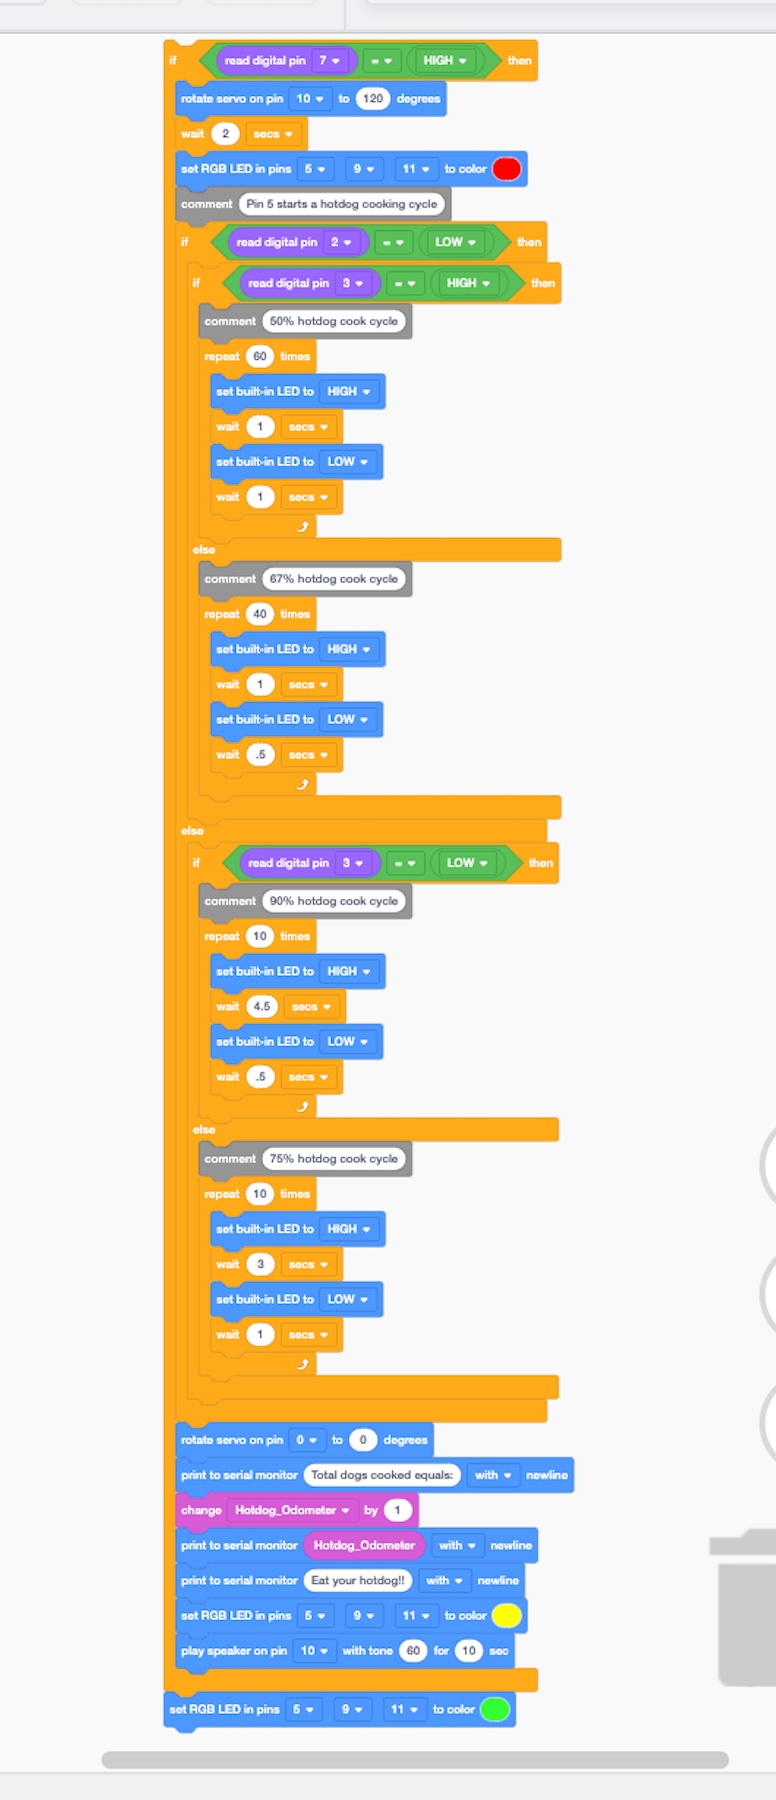
Here is the beta version block programming for the hotdog cooker: (I do see a few mistakes that need to be corrected. I will put the rev 2 code in the tab for the next class.) The latest revision for the Arduino code is rev3, and it can be seen in the tab for class six--3-D printing. I did have a few bugs in the code, and a few type ohs in the comments.
I do like the block programming option in TinkerCAD better for the Arduino, but is does appear to be a little limited compared to the text. This
present a problem for the stepper motor I plan to use to open and close the safety cover of the hotdog cooker. I do not see a stepper motor in the
TinkerCAD components so I do not have a way to write the stepper motor part of the program with block code. Tinker CAD does have an L293D (h-bridge) that
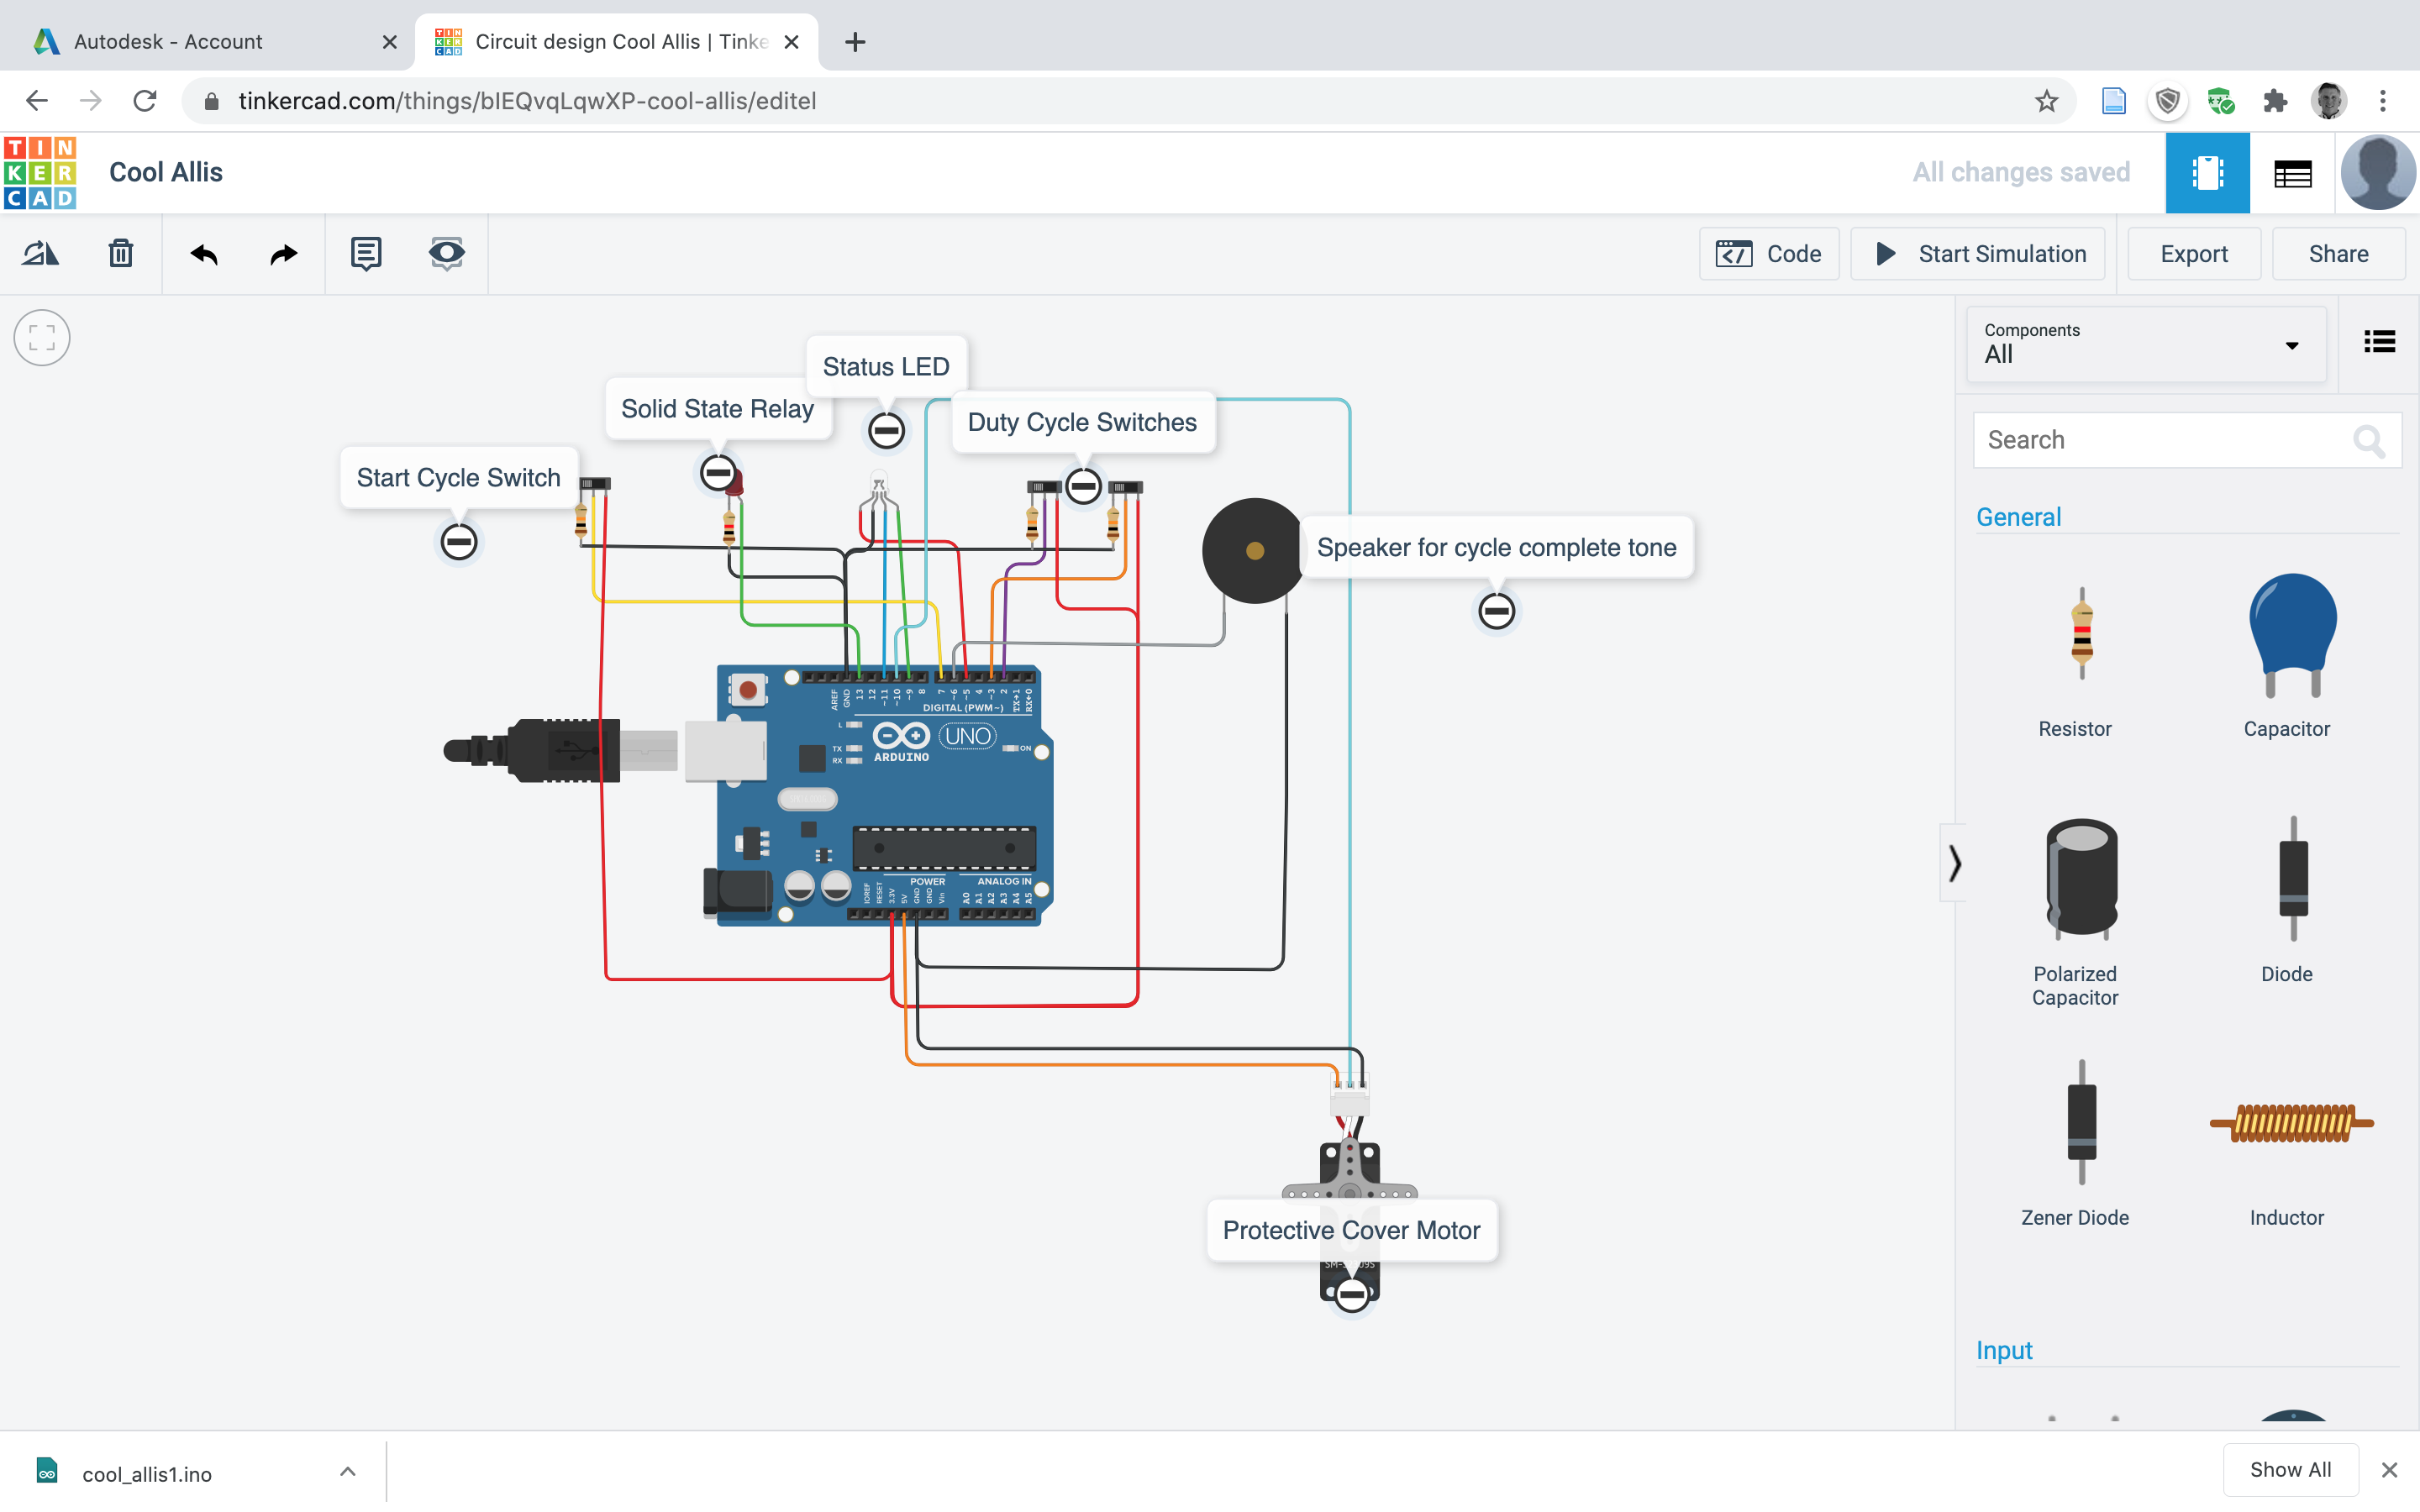
supported by block code, so that may be an option. The simulation in TinkerCAD ran very well. I believe everything worked correctly. I did a quick bread
board simulation on the bench and all seemed to be well. I do want to replace the "cycle start switch" (which is a two position slide switch) in my circuit
with a momentary contact push button. The slide switch causes the program to run cycle after cycle until the switch is moved back to "low". The momentary
contact will run one cycle when pushed stopping when complete (I think!).

Return to my home page.
Arduino circuit: to control a servo motor that will close the cooking chamber. This will turn a lenght of 3/8-16 threaded rod that will act as a linear actuator. After the cover is closed the solid state relay is pulsed to control the 120vac to the cooker nails. Two switches control four possible cooking intensities. Then the sevro motor opens the chamber and a tone is sounded.

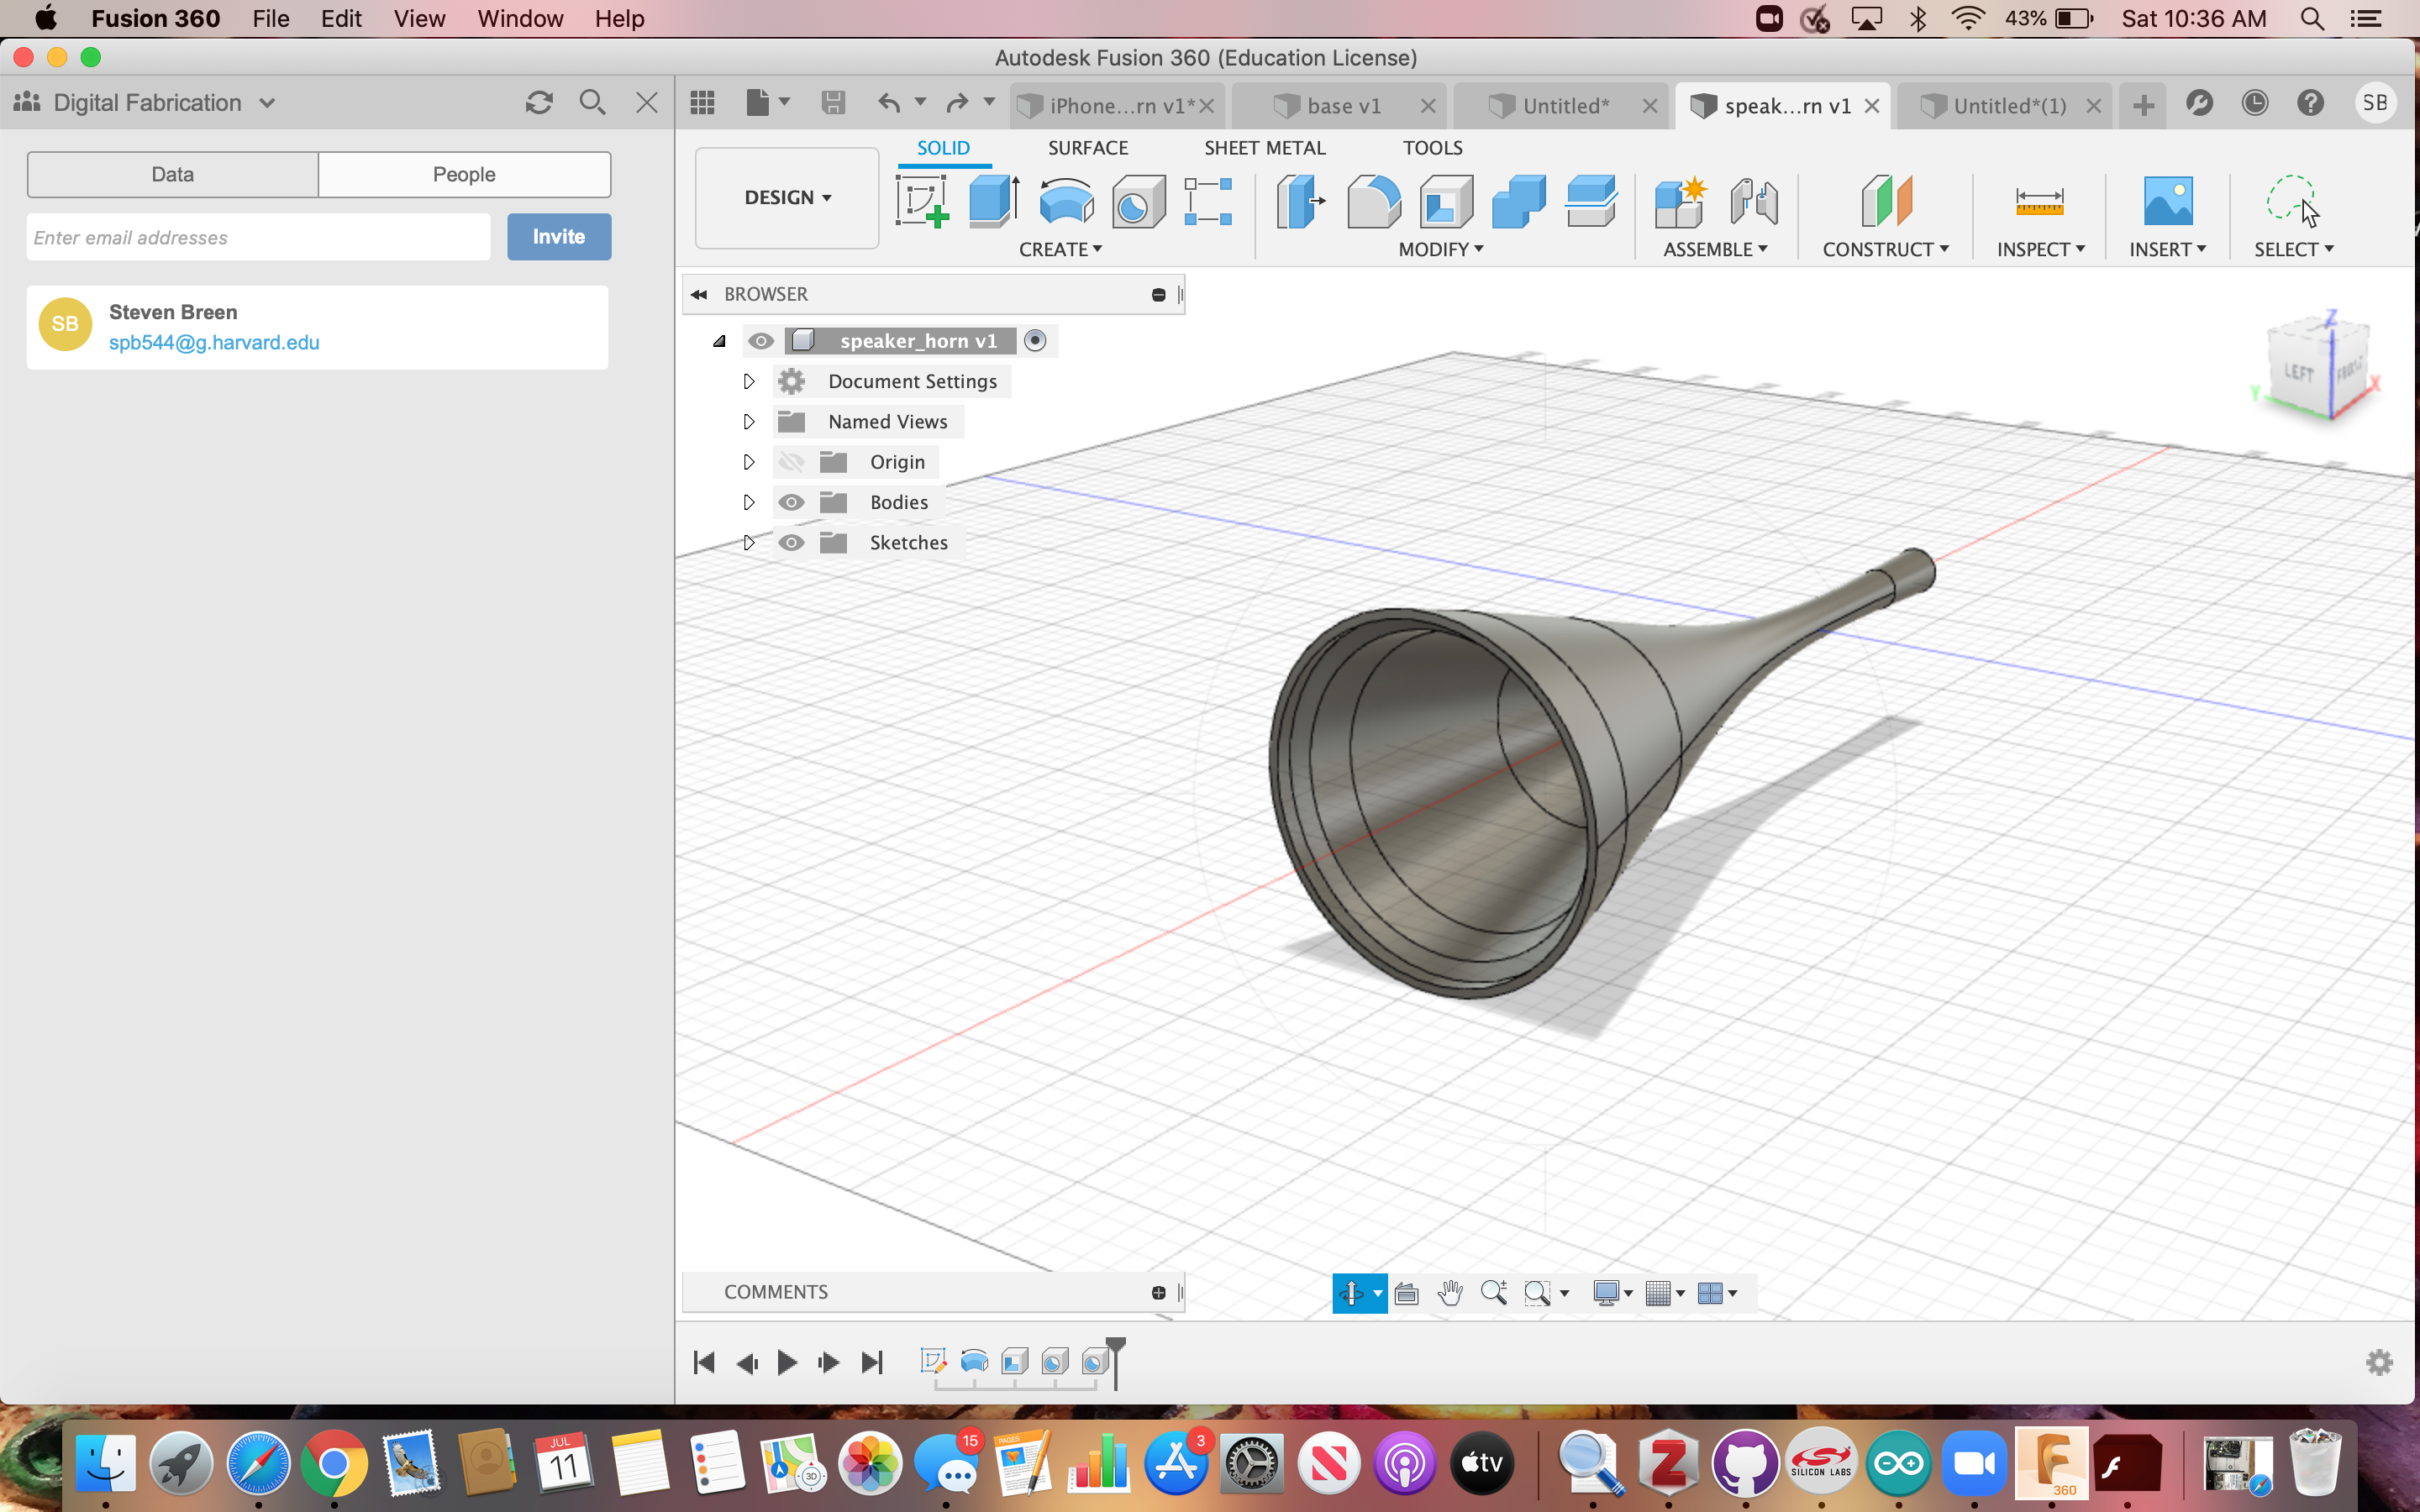
Fusion 360 Designed Object:

The object I desiged using fusion 360 is the beginnings of an audio horn that could possibly be used to amplify the sound from an iPhone. I would like to curve the horn into a modified "S" shape.
Here is a link to the Fusion 360 file Fusion 360 horn design.
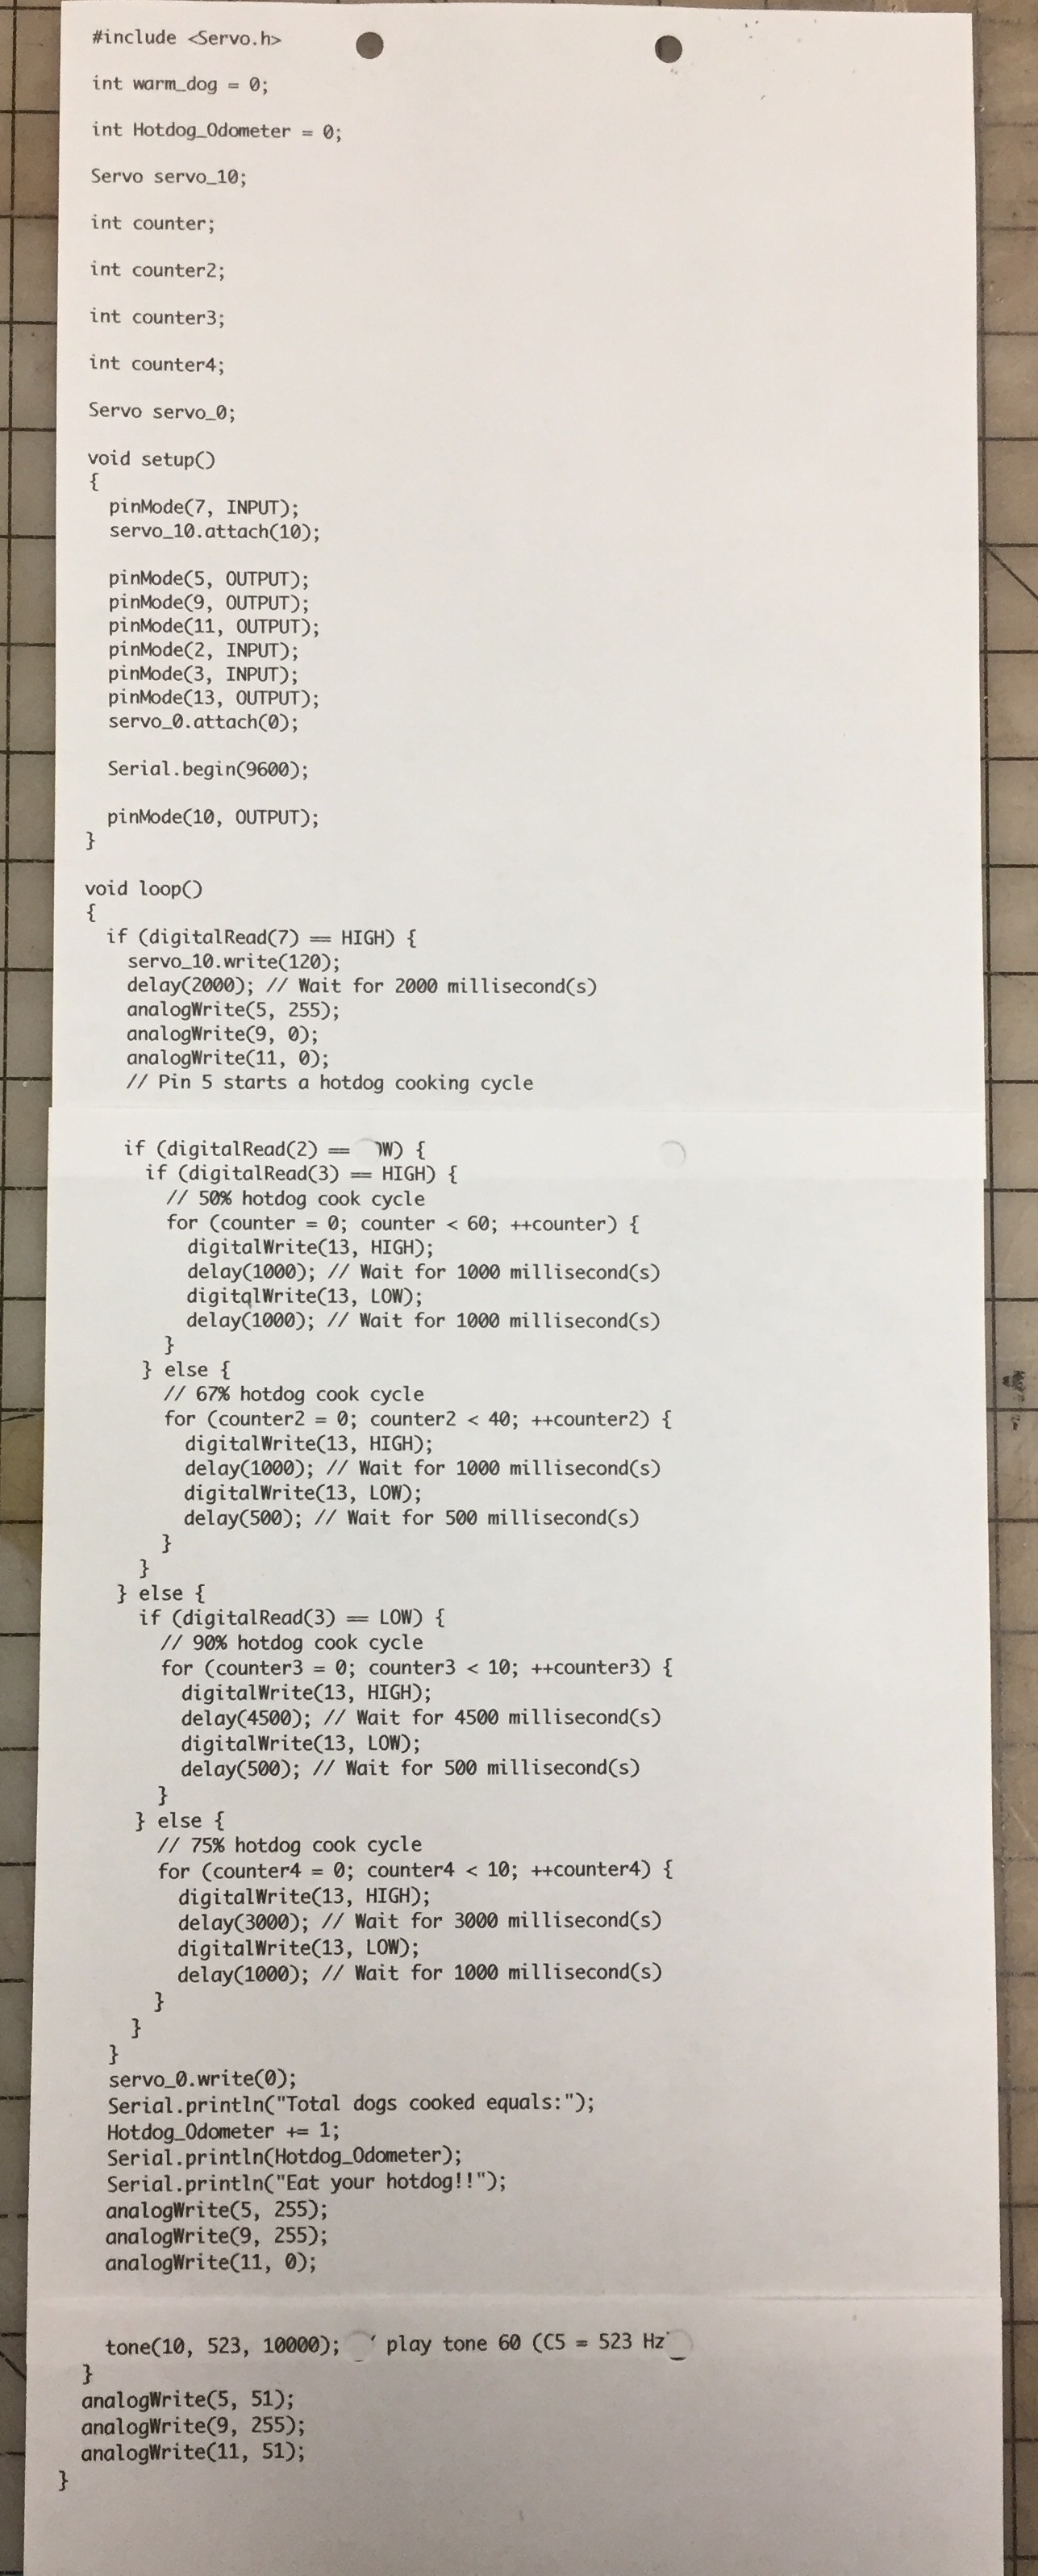
Text of the Arduino code:

(I have made some revisions to this original code. The latest rev is #3 and is pictured in the tab for 3-D design & printing.)
The operation of the solid state relay with the "blink" program:
I did this little experiment just to be sure the 3.3vdc output of pin 13 on the Arduino would be sufficient to activate the solid state relay. The ssr has an input range of 3-32vdc. Pin 13's output is on the extreme low end of the ssr's range, but everything seemed to work fine.